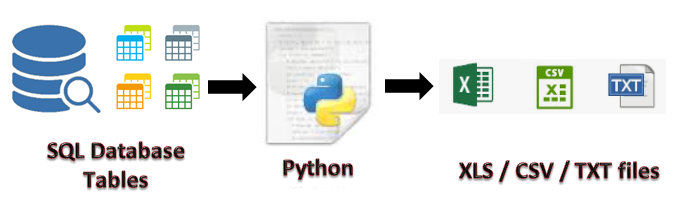
If you are working as Python developer, data analytics or data scientists for any organisation then it is very important for you to know how to store and access your data such as you need to pull some database tables into csv or txt files for the further analytics process.
If you want to dump each table in CSV format, it does call for a bit of code. Create a python loop to iterate through all the tables and then execute a SELECT query on each of those tables.
Relational databases are the most common storage used for web content, large business storage, and, most relevant, for data platforms. RDMSs will return results with all the same columns, so what you’re doing doesn’t really fit. What I would do is query the metadata table and get a list of all tables, then query each table and append that to the respective file.
Before we begin, you should make sure you have the necessary tools installed. The most important thing is to have a local version of SQL Server installed on your computer.
Package and Libraries — You need to have some Python packages and libraries to communicate your Python code with your source (SQL Server database tables) to destination (csv or txt files) areas as given below-
# pandas library for data manipulation in python
import pandas as pd
#pyodbc module that makes accessing ODBC databases
import pyodbc
#urllib module — allows you access websites via your program
import urllib
#SQLAlchemy SQL toolkit and object-relational mapper
from sqlalchemy import create_engine
Connecting to SQL Server Database — If you wish to communicate to the SQL Server, you need to use a type of client that speaks the database protocol described earlier. We’ll use pyodbc, an open source library that implements the SQL Server protocol as given below -
#create a database connection function
def db_connections():
quoted = urllib.parse.quote_plus(“Driver={SQL Server}; Server=server; Database=dbname; uid=sqluserid; pwd=password”)
engine = create_engine(‘mssql+pyodbc:///?odbc_connect={}’.format(quoted))
return engine
Define data tables structures — Now, it would be very useful if you can create a method to define your data columns structures based on your data tables. For an example, you want to pull your Employee, Department, Project tables from your database then you can create a method to define the structures of those respective data tables as given below -
# function — define columns structures
# txt — table name
def df_cols(txt):
#check table name
if txt==’TB_Employee’:
df=pd.DataFrame(columns=[‘Emp_NO’,’Date_Of_Joining’,’Emp_Name’,’DOB’,’Address’,’DeptId’])
elif txt==”TB_Account”:
df=pd.DataFrame(columns=[‘Account_Key’,’AccountNum’,’AccountName’])
elif txt==”TB_Category_Dim”:
df=pd.DataFrame(columns=[‘Cat1Id’, ’Catgeory1', ’Cat2Id’, ’Catgeory2', ’Cat3Id’, ’Catgeory3'])
elif txt==”TB_Department”:
df=pd.DataFrame(columns=[‘DeptId’,’Dept_Name’,’DeptHead’])
elif txt==”TB_Contract_DIM”:
df=pd.DataFrame(columns=[‘Contract_Key’ ,’Contract Number’ ,’Contract’ ,’Contract Limit’ ,’Contract End Date’ ,’Line Type’])
elif txt==”TB_CostCenter_DIM”:
df=pd.DataFrame(columns=[‘CostCenter_Key’ ,’CostCenter’ ,’CostCenterDesc’])
elif txt==”TB_DATE_MAP”:
df=pd.DataFrame(columns=‘DayDate’ ,’DAYNO’ ,’WEEK_NO’ ,’YEAR_NO’ ,’FIN_WEEK_NO’ ,’FIN_PD_NO’ ,’FIN_YR_NO’,‘FIN_PD_WEEK_NO’ ,’AH_WEEK’,’FIN_QTR_NO’])
elif txt==”TB_Item_DIM”:
df=pd.DataFrame(columns=[‘Item_Key’,’ItemNo’,’Category1'])
elif txt==”TB_Project_Dim”:
df=pd.DataFrame(columns=[‘Project_Key’ ,’Project Number’ ,’Project Name’])
elif txt==”TB_Requestor_Dim”:
df=pd.DataFrame(columns=[‘Requestor_Key’,’Requestor Name’,’Requestor Location’])
elif txt==”TB_Supplier_DIM”:
df=pd.DataFrame(columns=[‘Supplier_Key’,’Supplier Number’,’Supplier Name’,’Supp Address Line 1',
‘Supp Address Line 2’,’Supp Address Line 3',’Supp City’,’Supp Post Code’,
‘Supp Country’,’Supplier Terms’])
return df
Create List for Data tables — Now, we have to create a static list of your data tables as given below —
#table list
MyList=[‘TB_Employee’,’TB_Account’,’TB_Category_Dim’,’TB_Department’, ‘TB_Contract_DIM’,’TB_CostCenter_DIM’,’TB_DATE_MAP’,
‘TB_Item_DIM’,’TB_Project_Dim’,’TB_Requestor_Dim’,’TB_Supplier_DIM’]
Define File Path — if you want to store these data files into any specific location then you can set a path for this as given below —
#file path to database tables
mypath=r’E:/MyPath/Database Files/’
#initaite database engine
engine=db_connections()
# set table variables
txt=’’
FOR Loop — Create a python loop to iterate through all the tables and then execute a SELECT query on each of those tables and set the table name in local variable to pull the columns structures and you already know the sql statements that you want to execute as given below —
#calling mylist items within for loop
for l in MyList:
print(l)
#set database table name into variable
txt=l
#set filepath with table name with csv extension
filepath=mypath+l+’.csv’
#set query for data pulling from db
sqlQuery=’SELECT * FROM DBO.’+l
#binding dataframe with respective data columns
df=df_cols(txt)
#pulling data into dataframe from database
df=pd.read_sql_query(sqlQuery, engine)
#drop indexes from dataframe
df=df.reset_index(drop=True)
#write dataframe into csv files on the defined location
df.to_csv(filepath,index=None, header=True)
Now, you can see this is very easy task to pull some database tables into csv or txt files by using Python. To learn more, please follow us -
To Learn more, please visit our YouTube channel at —
To Learn more, please visit our Instagram account at -
To Learn more, please visit our twitter account at -


SQL skills help data experts maintain, create and retrieve information from relational databases, which separate data into columns and rows. It also allows them to access, update, manipulate, insert and modify data efficiently. best SQL Courses
ReplyDelete